STEPS TO CONFIGURE WEBMAIL ACCOUNTS IN GMAIL
REQUIREMENTS:
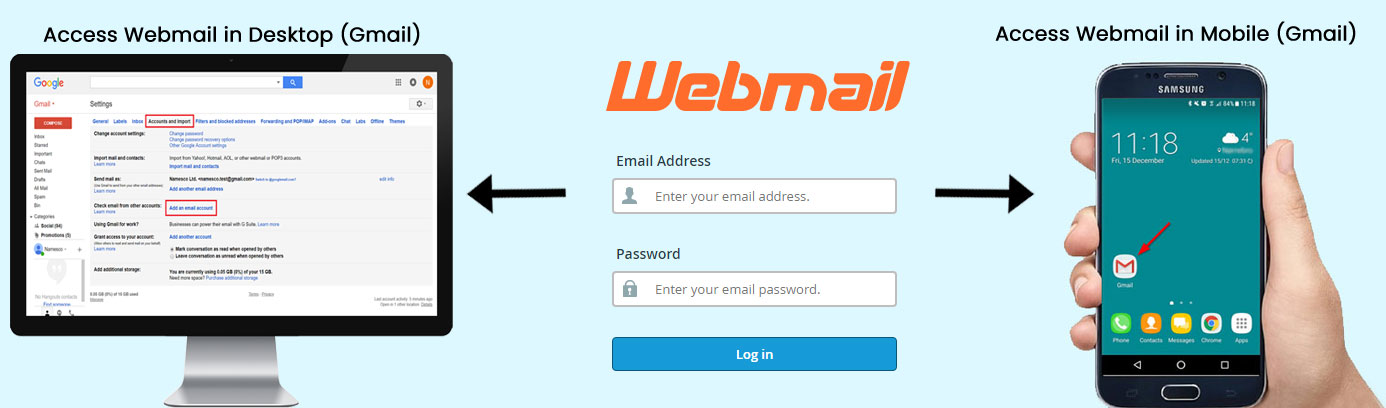
1. Access of email Webmail Login
2. A Gmail account
– In order to setup webmail email account on Gmail, you must need valid email address and password.
– First test your email id and password by accessing webmail, if you are able to login successfully it means the credentials are correct.
You can go a head to setup your email account in outlook (Third Party Email Client).
– Usually a Webmail Access URL is:
http://www.example.com/webmail OR http://www.example.com:2095
 PLEASE NOTE: You will get the mail client setting once you login to webmail, Above screenshots are just for demonstration purpose.
To configure webmail in Gmail, simply follow below two steps
Steps to Configure Webmail in Gmail (Desktop)
STEP 1:
– Login to your Gmail Account.
– Now go to Gmail Settings.
 STEP 2:
Under the Accounts and Import tab, select Add an email account.
 STEP 3:
Enter your Email address and click Next.
 STEP 4:
With Import emails from my other account (POP3) selected, click Next.
 STEP 5:
Enter your Email address and Email password as the Username and Password, respectively.
Enter mail.yourdomainname.com as the POP Server and use the recommended settings provided below.
Then click Add Account.
 STEP 6:
On the next page click on Next to setup your outgoing mail.
 STEP 7:
Enter the Name that you want to appear in your emails. Click on Next Step.
 STEP 8:
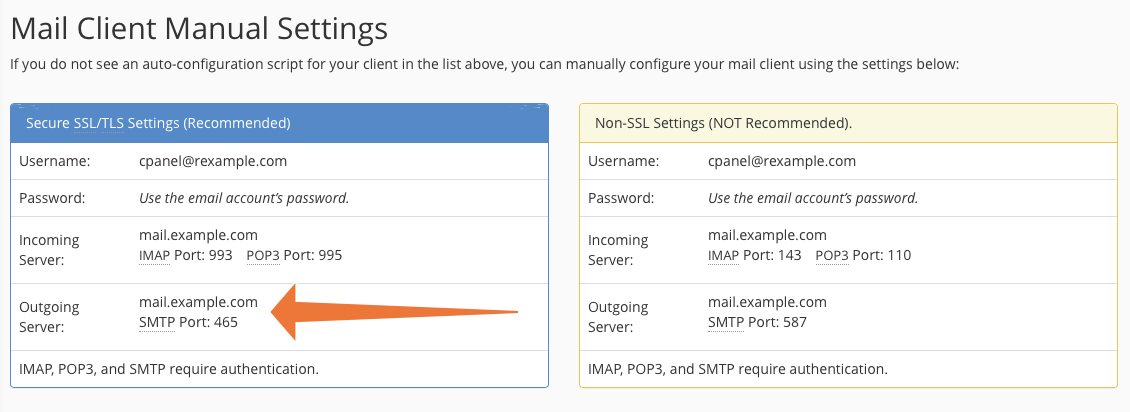
Complete the SMTP Server settings and use your Email address and Email password as the Username and Password, respectively.
Use Port 465
Click Add Account.
 STEP 9:
You will then be sent an email to your email address with a Verification Code. Enter your unique code in the box shown below, and click Verify.
 Your email account is now setup.
DONE
Steps to Configure Webmail in Gmail (Mobile)
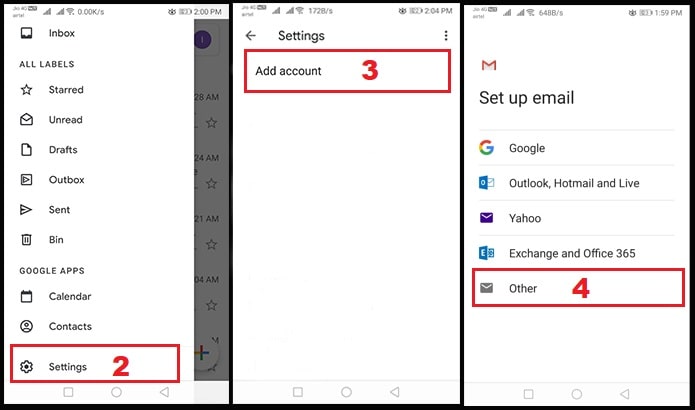
1. Open the Gmail app on your mobile.
2. Tap the menu icon in the upper left corner – Settings
3. Tap – Add account
4. Tap – Other
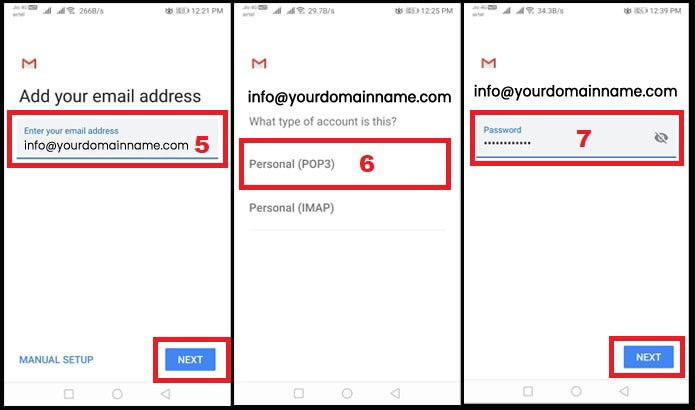
 5. Enter your full email address and tap Next
6. Select Personal (POP3)
7. Enter your webmail Password and tap Next
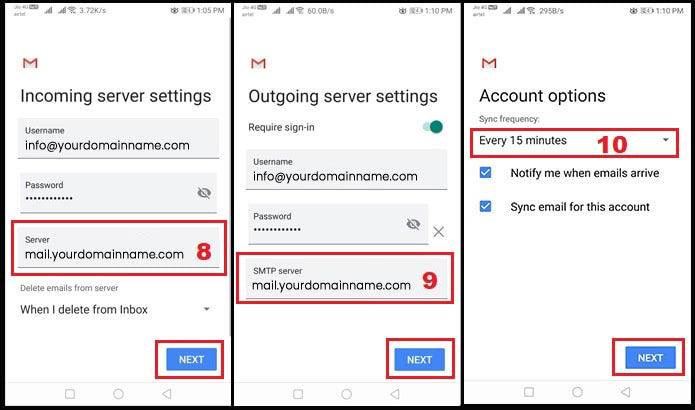
 8. Under the Incoming Mail Server add the following – mail.yourdomainname.com
9. Under Outgoing Mail Server, add the following – mail.yourdomainname.com
10. Account Sync Frequency select any one option – a. Every 15 minutes b. Every 30 minutes or c. Every hour
 11. Tap Next – Finish
Congratulations! You have now configured your webmail in Andriod Gmail.